
The initial export
Now back to the OpenWGA developer
studio. You most likely have an OpenWGA runtime project there which
contains your websites design and maybe already some content that you
both want to appear on your live server. We will now show you how to do
this.
For the initial export of a web application the OpenWGA developer studio since version 1.3 provides an export wizard. In order to perform such an export the developer studio needs access to both (your production server and your development runtime). So the next step is to start your runtime project which contains your website.
Just right-click your runtime project and choose OpenWGA / Start WGA Runtime
When your runtime is up and running you can start the web application export. Right-click your runtime project and choose OpenWGA / Export Web Application...
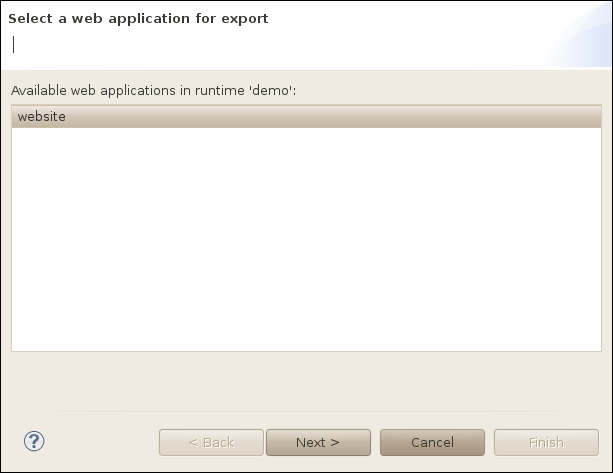
The wizard will launch and first wants you to select which web application you want to export:
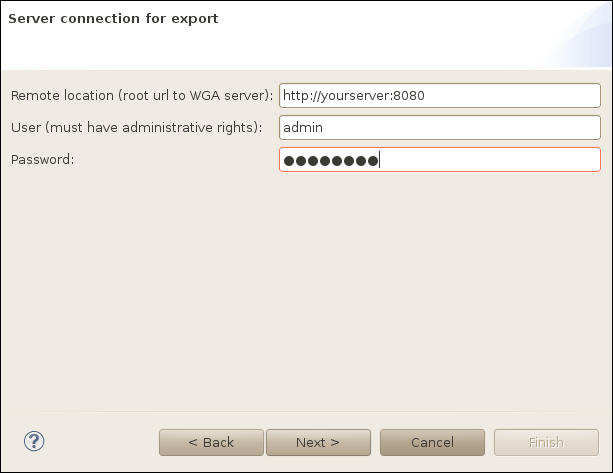
In the next step you will specify the server URL and the administrative user/ password of your production system:
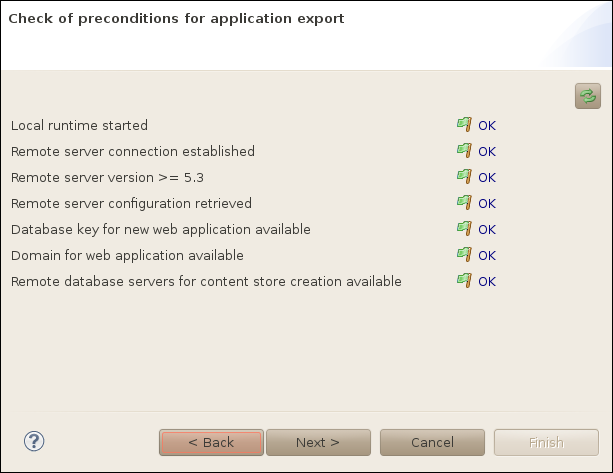
The export wizard will now communicate with your production server and check some preconditions for the export:
In your development environment you normally use the embedded HSQL database server of OpenWGA to store the content of your websites. On a production system you should use a database backend which is designed for performance and reliable can handle higher amounts of data. We prefer MySQL as backend database which you should have already installed on your server during the initial setup described above. In the next export step you get a list of the database servers available on your production OpenWGA server and can choose one to become the backend storage for your web application:
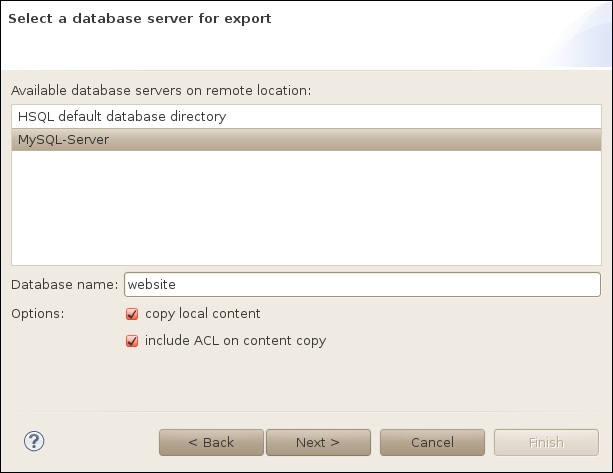
You can further enable or disable the export of your local content to your production server in this step. If you disable "copy local content" the wizard will just create an empty database on your server.
On the last step you will get an overview of your export and the steps which will be performed when finishing the wizard. This page should look like this:
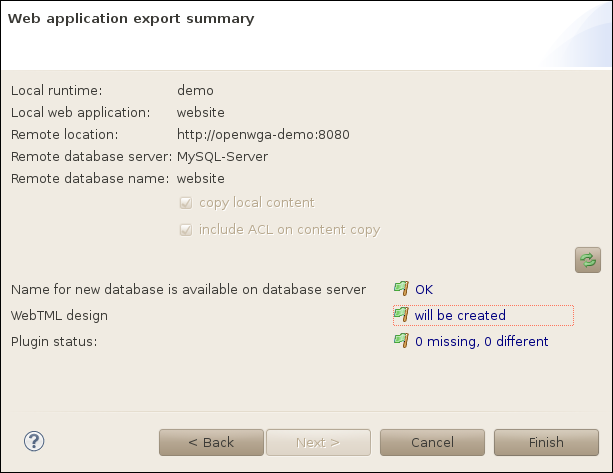
Just click "Finish" to perform the export.
Continue on next page ...