This tutorial guides you through the installation of the OpenWGA CMS and Apache Tomcat on Microsoft Windows. This is the preferred way to set up a production server on Windows.
To install OpenWGA CMS for developing and testing purposes the OpenWGA Developer Studio is probably the better choice.
Required Downloads
- Java SE SDK, also named "JDK", of Version 6.0 or higher. Though a JRE is suitable to run OpenWGA the additional debugging tools of the JDK might be helpful. Thus we recommend to install the JDK. Please choose the 32 Bit or 64 Bit JDK according to your Windows installation.
- Apache Tomcat 6.x. Please download the "32-bit/64-bit Windows Service Installer".
- OpenWGA CMS WAR File Distribution
- Additional Libraries
Installing the JDK
Install the JDK by running the downloaded executable. Follow the steps of the installation wizard. The defaults do not need to be changed.
Installing Tomcat
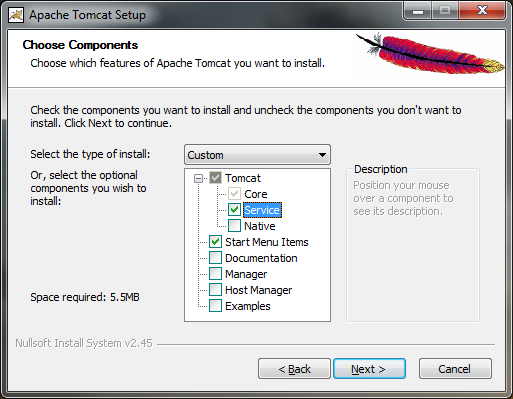
Install Tomcat by running the downloaded executable. Choose at least Tomcat/Core, Tomcat/Service and the Start Menu Items.

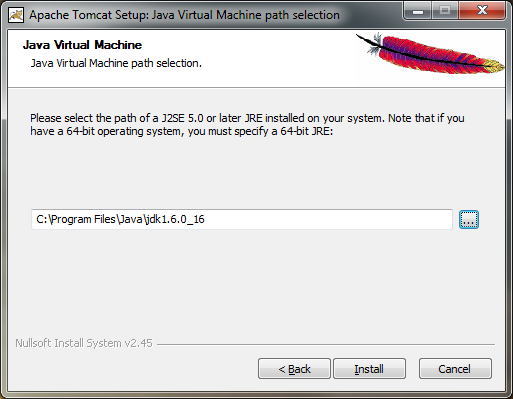
Follow the wizard keeping or modifying the defaults to suit your requirements until you reach the "Java Virtual Machine Path Selection" It defaults to the JRE. Make sure to change the path to point to the JDK and then click "Install".

After the installation unselect the checkboxes "Run Apache Tomcat" and "Show Readme" as some more steps are required before running Tomcat.
Continue on next page ...
