The easiest and preferred way to get started with the OpenWGA Java CMS ist to download, install and use the OpenWGA Developer Studio.
Download OpenWGA Developer Studio
The OpenWGA Developer Studio packages an OpenWGA CMS Server together with all necessary development and deployment tools to create, develop, extend and maintain your OpenWGA CMS Applications. It can either be installed as a stand alone application or as a plugin into an existing Eclipse installation.
What we will do
- create and start a new OpenWGA runtime
- create a new website inside that runtime
- Use the OpenWGA Conent Manager to add/change pages
Create a new WGA Runtime
The first step you need to do is to create a new "WGA Runtime Project" using the project wizard:
Click File->New->WGA Runtime Project

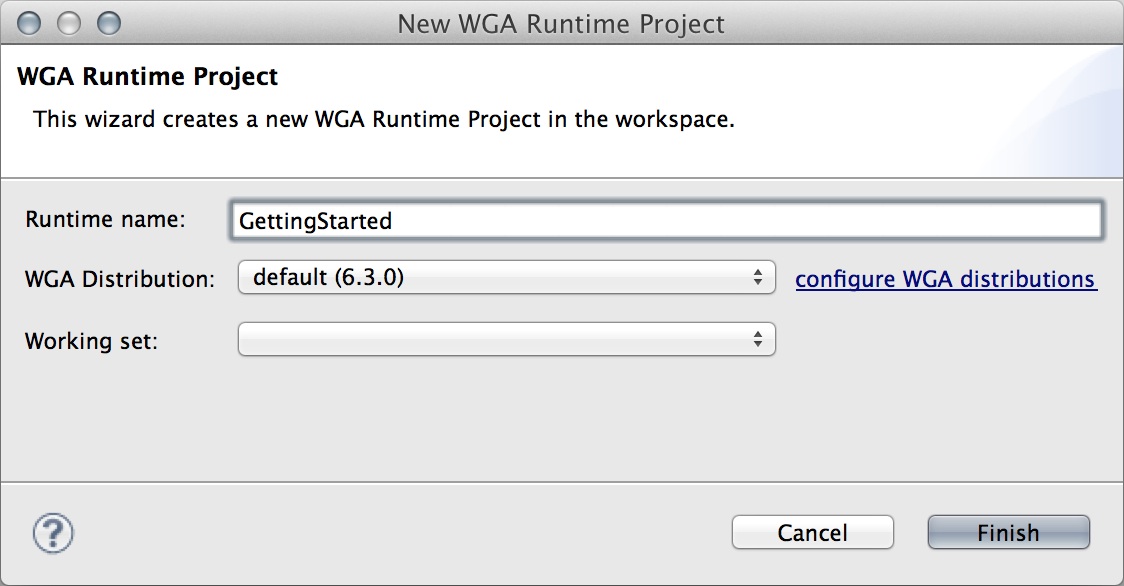 Enter a name for your runtime for e.g. "GettingStarted" and click "Finish".
The wizard creates a new project containing all necessary files and folders to run your web applications:

The WGA Runtime does not only act as a "container" for your web applications. It also contains the complete configuration of your OpenWGA system, including the configuration of the integrated Apache Tomcat application server. You are able to check-in the WGA Runtime project to your CVS or SVN code repository and share it. Other developers can check out your runtime and start working in exactly the same environment where you developed and tested your applications.
As an OpenWGA developer you will typically create one WGA Runtime for each customer you work for or for each OpenWGA server whose designs you maintain.
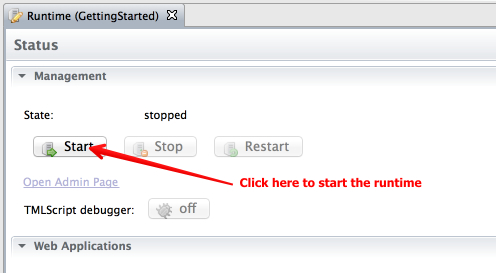
Start the runtime
Even though the runtime currently is "empty" and does not contain any website you can and should start the runtime:
Open you browser and enter the following URL:
http://localhost:8080
You should see the OpenWGA welcome page.

Create your first Web Application:
The next step is creating a new website (Application) inside the Runtime. Do this by clicking the "Create new web application" link on the runtime status page or choose menu File / New / WGA Web Application to start the "New-App-Wizzard":
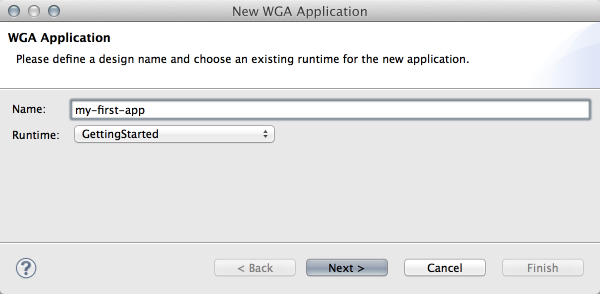
Enter a name for your app and click on "Next":
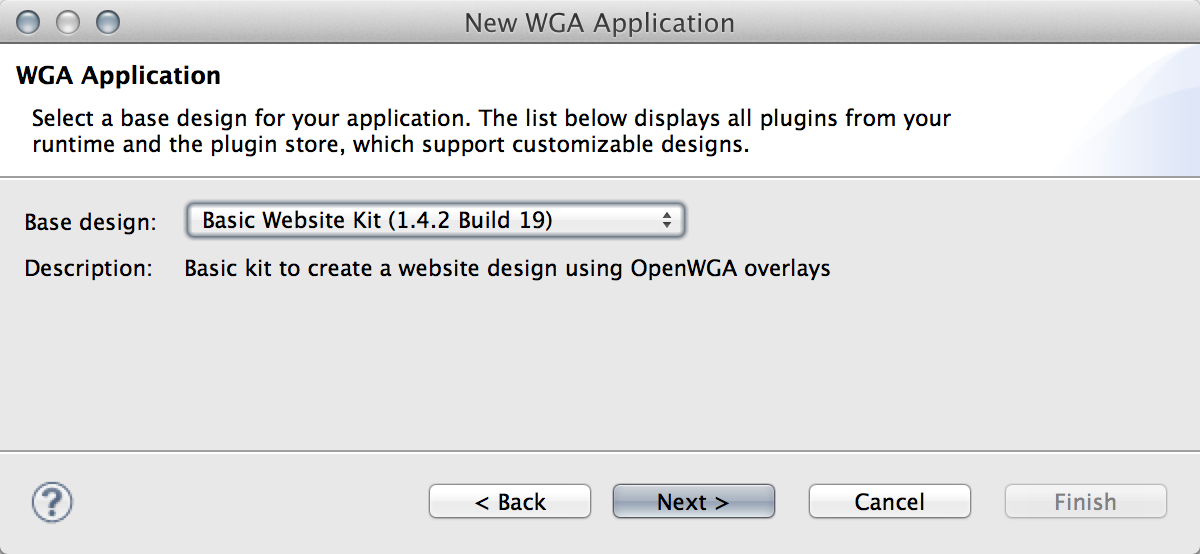
Select "Basic Website Kit" as Base Design.
Click on "Next":
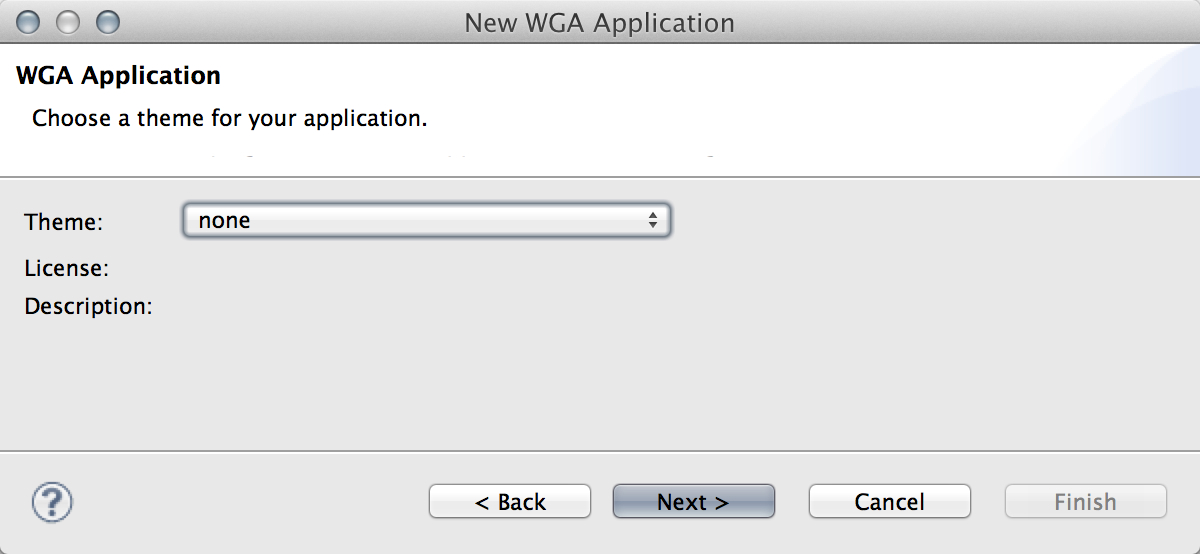
You will be asked for a "theme". OpenWGA provides a set of themes that can be used as a starting point. In this tutorial we don't select a theme so the select box should say "none".
Click on "Next":
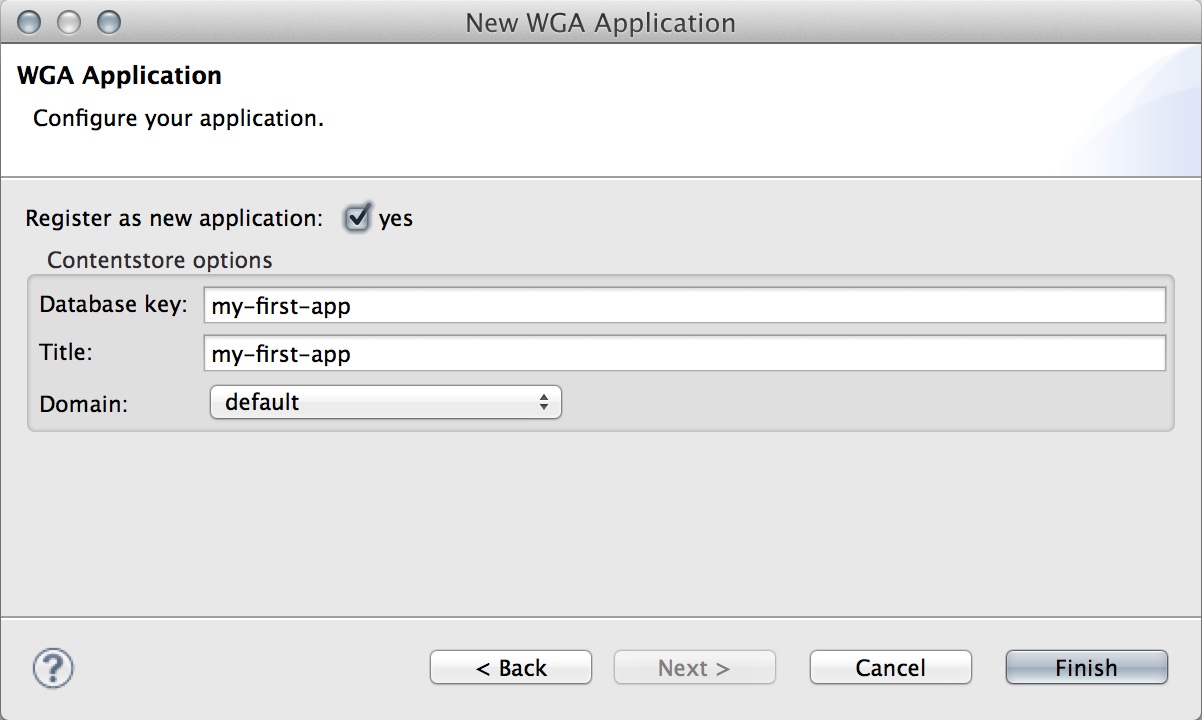
Leave all settings as they are and click on "Finish".
Your first OpenWGA web application (website) ist created.
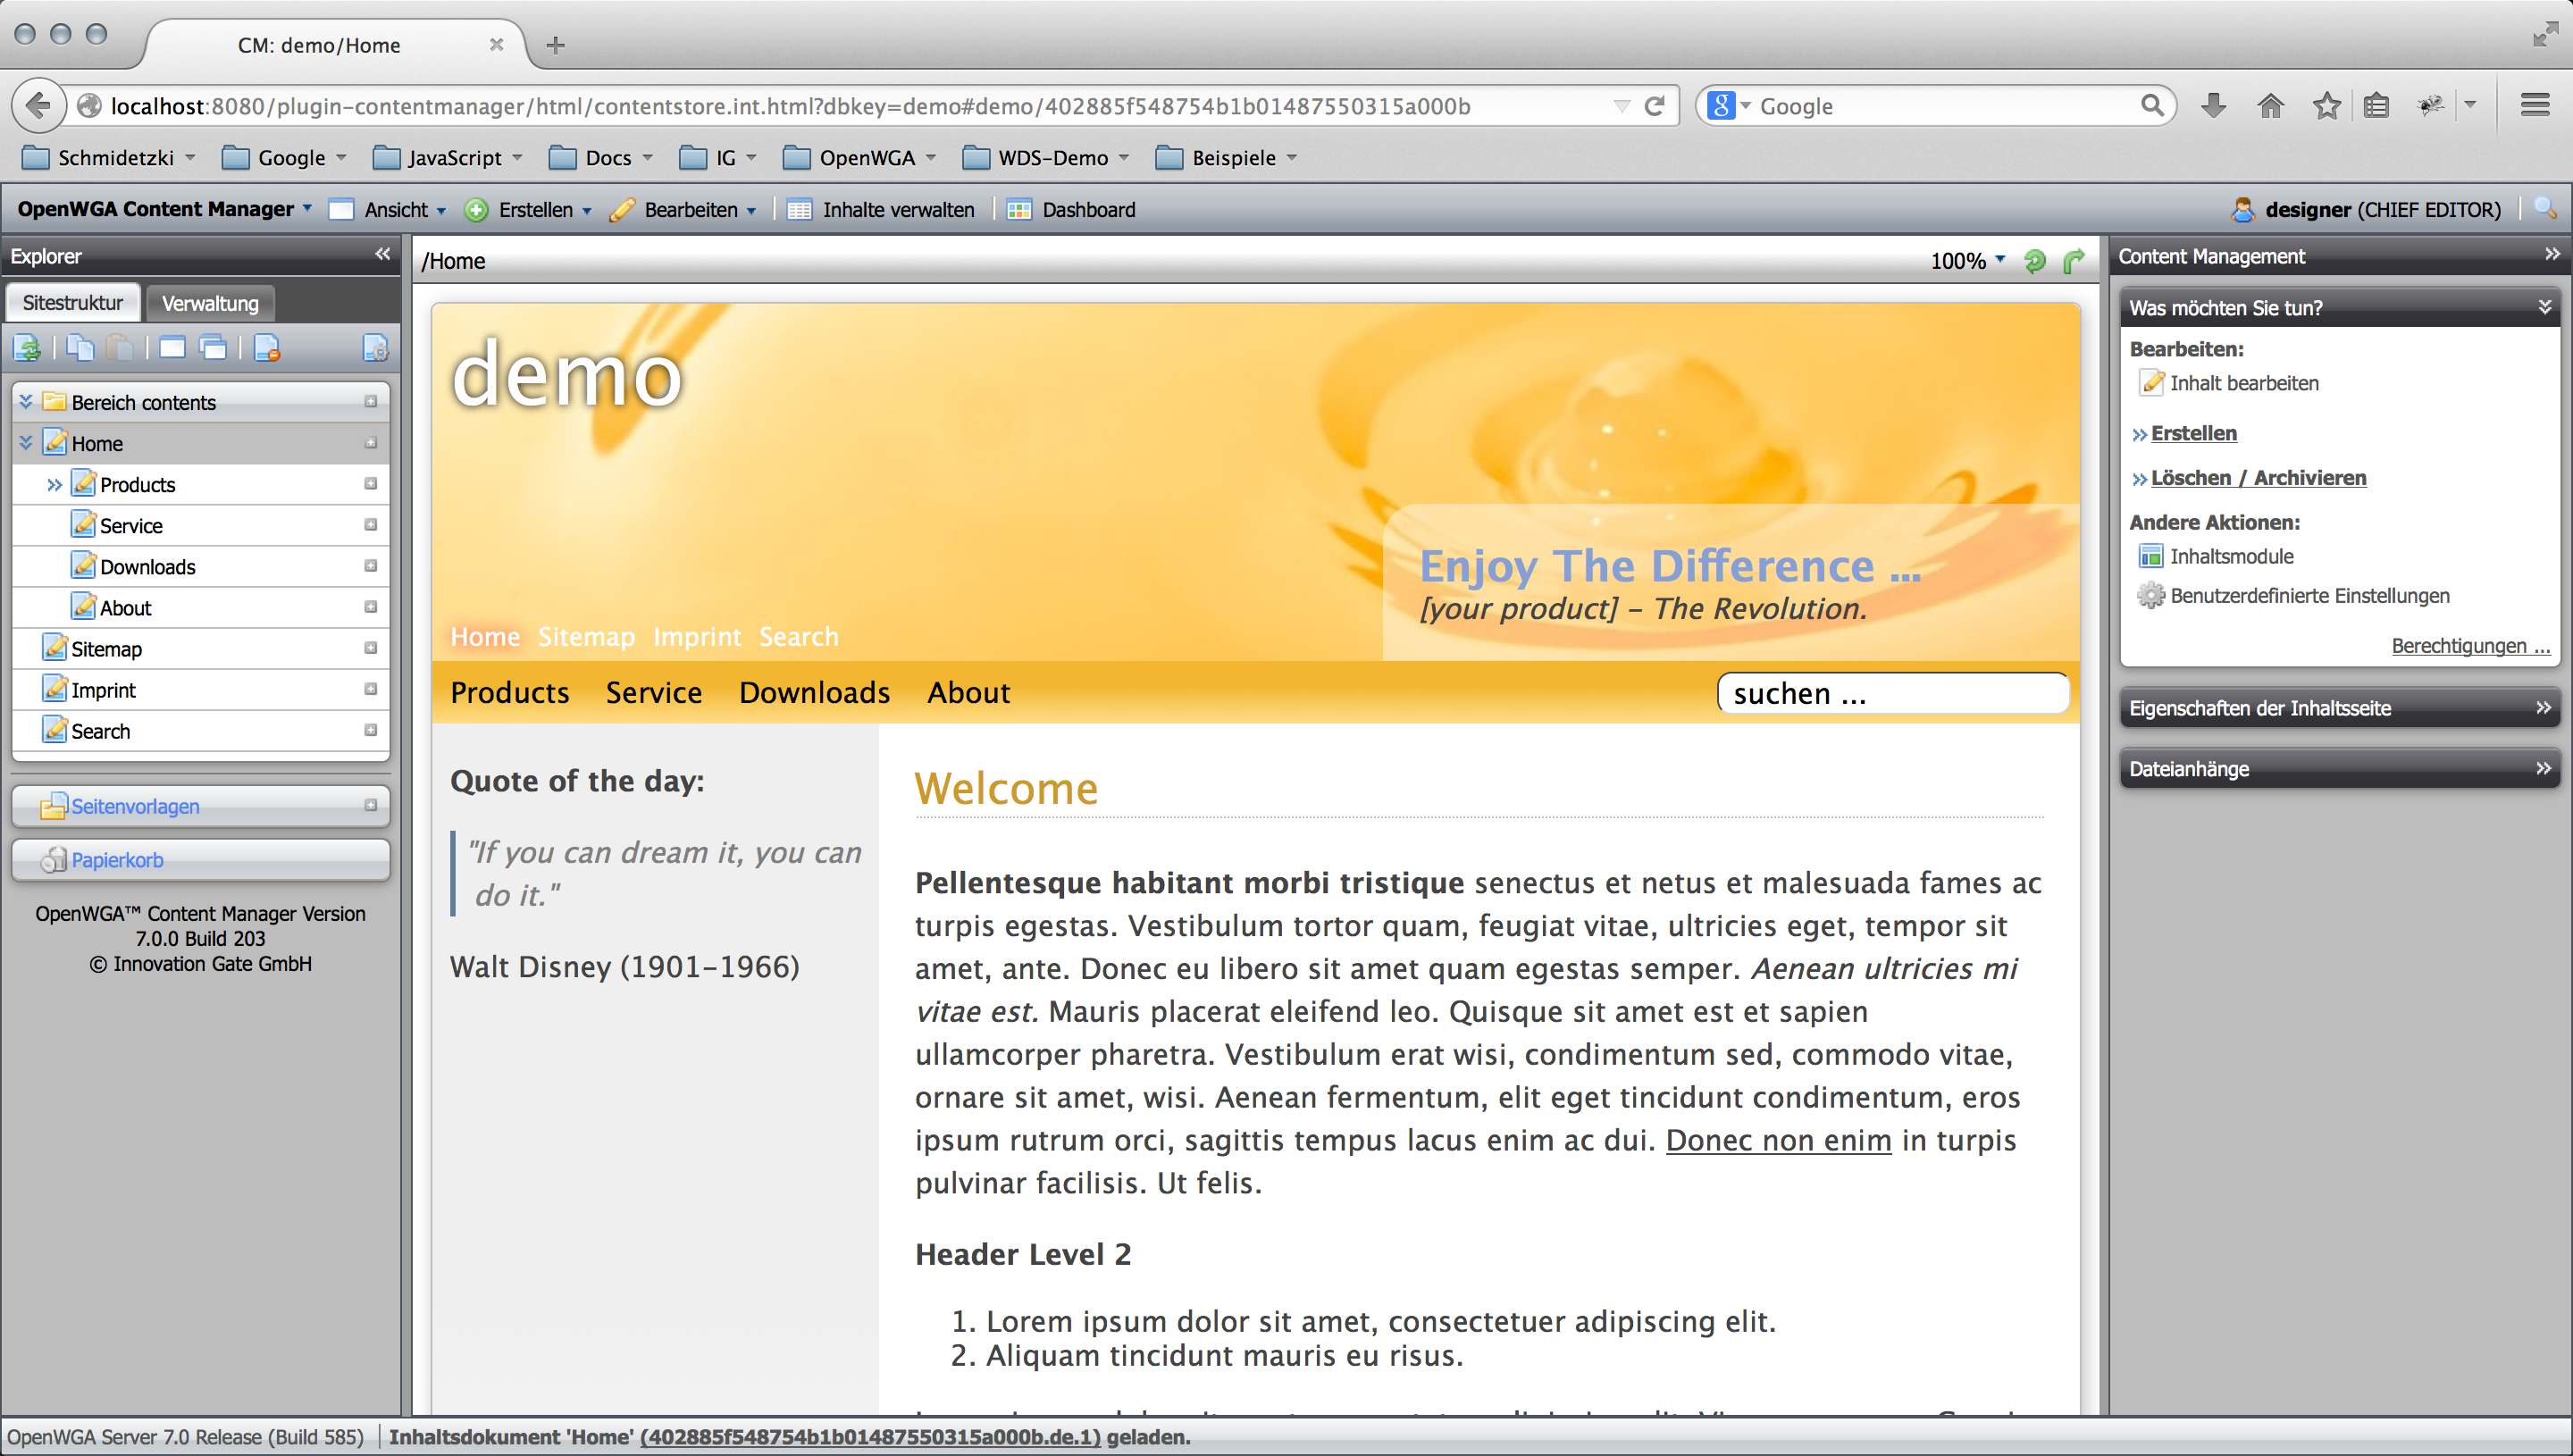
Create and edit pages using the OpenWGA Content Manager
Enter the following URL in your browser:
http://localhost:8080/contentmanager
to open the authoring UI of OpenWGA. You will be asked for a "site". Enter the name you used when creating the web application. In our sample the site is named "my-first-app".
When asked for username/password enter "designer" as username and "wag" as password. The OpenWGA Content Manager should show your site and offers the authoring UI to edit the site.